latest project
Page 1 of 5 • 1, 2, 3, 4, 5 ![]()

 latest project
![]() daz.h Mon Jul 12, 2010 2:57 pm
daz.h Mon Jul 12, 2010 2:57 pm
its my take on what i think might have happened to the luna line had the innocenti factory continued for a while longer.
as i'm sure most are aware that towards the last of the gp200 run they introduced a electronic set up, along with a special seat for the uk models.
also the gp's and the lunas that were shipped out to australia were fitted with indicators, some of these models stayed in this country.
so i intend to build a electronic vega, along with a similar seat to the gp200 electronic and then fit other parts that i think would have eventually got fitted as standard, these been a lesheild tool box and front dampers on the forks.
i had a old motor and was lucky enough to be given a old frame by pete davies (luna chairman) only to find that there were only about 56 numbers away from each other
the frame needed a new rear strut and other little bits of welding here and there and it was the frame with the clamp on steering lock, just my luck
so here are a few pics to be going on with.
daz

daz.h- Posts : 869
Join date : 2010-06-27
Age : 55
Location : york
Re: latest project
![]() daz.h Mon Jul 12, 2010 3:16 pm
daz.h Mon Jul 12, 2010 3:16 pm

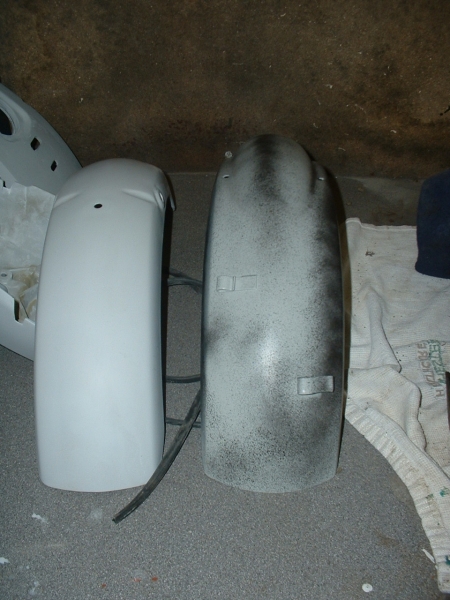
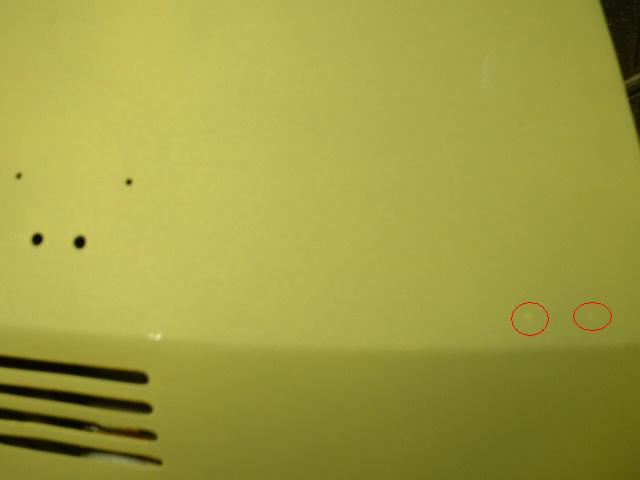 not sure if you can see, but these were new unused legsheilds and had the tooling marks where the old type badges had been previously fitted.
 the old seat after stripping.
 new seat cover and foam in electronic style.


daz.h- Posts : 869
Join date : 2010-06-27
Age : 55
Location : york
bread bin
![]() littlemoon Mon Jul 12, 2010 3:41 pm
littlemoon Mon Jul 12, 2010 3:41 pm

littlemoon- Posts : 162
Join date : 2010-07-05
Age : 52
Location : east yorks tha know's
Re: latest project
![]() daz.h Mon Jul 12, 2010 4:02 pm
daz.h Mon Jul 12, 2010 4:02 pm
the original flasher relay i belive is situated in the headset of all places, and you thought it was already a tight squeeze.
with going to 12 volt i'm tempted to use a vepa one i have spare and locate it in a better space.
as for the connector block i'm unsure, i have a indicator diagram somewhere so will have to check it out.
making a loom will be fun...........NOT
daz.h- Posts : 869
Join date : 2010-06-27
Age : 55
Location : york
Re: latest project
![]() Snails Tue Jul 13, 2010 1:43 am
Snails Tue Jul 13, 2010 1:43 am

Snails- Posts : 968
Join date : 2010-06-28
Age : 53
Location : Luna Base Alpha
Re: latest project
![]() daz.h Sun Oct 10, 2010 10:26 am
daz.h Sun Oct 10, 2010 10:26 am
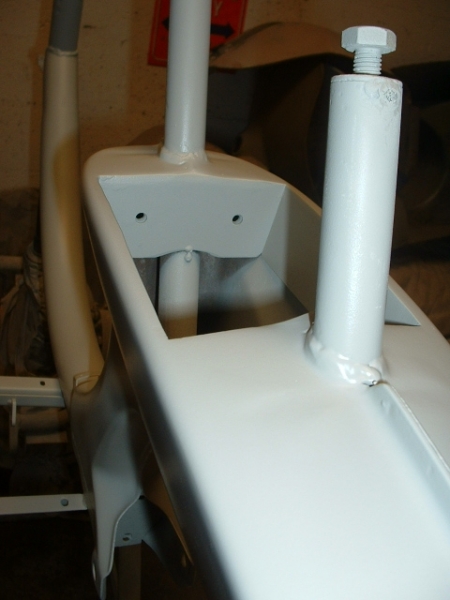
also i cant fail to mention littlemoon who has done a fantastic job making up a metal toolbox to go under the petrol tank and also fabricated and fitted frame strengtheners where the frame had been cut. and also modified my rear mudguard with a extra clip for me

hiswork can be seen here.
https://lunaownersclub.forumotion.com/tuning-conversions-f7/j125-tzr-150-reed-valve-t20.htm
the frame and associated parts are now all filled and in primer and was given a guide coat just after these pics were taken, fingers crossed i should be getting some painted parts back shortly, from carl a mate who paints my scooters, when it comes to been fussy and a perfectionist, he's it.

daz.h- Posts : 869
Join date : 2010-06-27
Age : 55
Location : york
Re: latest project
![]() littlemoon Sun Oct 10, 2010 11:13 am
littlemoon Sun Oct 10, 2010 11:13 am
daz.h wrote:well, quite a bit more has happened since my last post, i have now finally got a indicator switchand a big thanks to staffy who informed me of it

also i cant fail to mention littlemoon who has done a fantastic job making up a metal toolbox to go under the petrol tank and also fabricated and fitted frame strengtheners where the frame had been cut. and also modified my rear mudguard with a extra clip for me
hiswork can be seen here.
https://lunaownersclub.forumotion.com/tuning-conversions-f7/j125-tzr-150-reed-valve-t20.htm
the frame and associated parts are now all filled and in primer and was given a guide coat just after these pics were taken, fingers crossed i should be getting some painted parts back shortly, from carl a mate who paints my scooters, when it comes to been fussy and a perfectionist, he's it.
looking good daz, what colour is going to be ?. have you made any progress with the indicator wiring conundrum. i have made a bit of progress myself, today.
littlemoon- Posts : 162
Join date : 2010-07-05
Age : 52
Location : east yorks tha know's
Re: latest project
![]() Staffy (Gareth) Sun Oct 10, 2010 1:47 pm
Staffy (Gareth) Sun Oct 10, 2010 1:47 pm

Staffy (Gareth)- Posts : 169
Join date : 2010-06-26
Location : Just Outside Sunny Stafford -

Re: latest project
![]() daz.h Mon Oct 11, 2010 2:28 am
daz.h Mon Oct 11, 2010 2:28 am
as for the wiring set up i have bought from kempys a 2 pin flasher relay, and they gave me a colour copy of a 12 volt electronic, with indicators and no battery set up, wiring diagram, so i will follow that......... somehow
i have therefore removed the junction box from the lid top you made and had the two holes welded up, i have had to remove some of the spine you grafted on as the flasher relay is at a awkward angle and only sits in on the very middle and needs to be bolted in, and the spine was in the way.
i will be off to auto jumble in november to get my miles and miles of wire

staffy thanks for the pm mate
daz.h- Posts : 869
Join date : 2010-06-27
Age : 55
Location : york
Project
![]() Admin Mon Oct 11, 2010 3:46 am
Admin Mon Oct 11, 2010 3:46 am

Admin- Admin
- Posts : 437
Join date : 2010-06-13
Age : 57
Location : Leicester -

daz.h- Posts : 869
Join date : 2010-06-27
Age : 55
Location : york
Re: latest project
![]() daz.h Sun Oct 24, 2010 2:35 pm
daz.h Sun Oct 24, 2010 2:35 pm

crank is in the motor, along with new jap rod from chiselspeed.
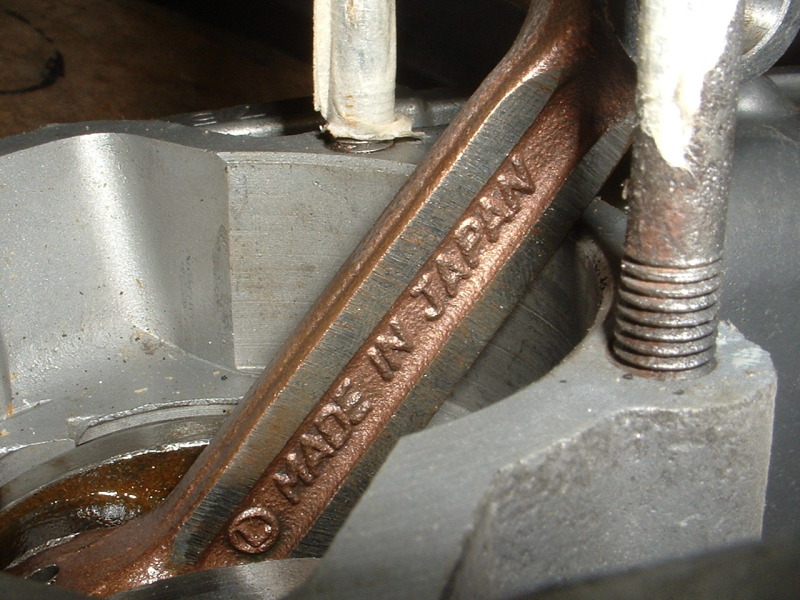
casing has been fitted with stainless studs around the side casing, chain guides and the magneto plate wiring plate, the small screws in the mag plate are notorious for seizeing in and snapping


finally, the piston, a 50mm malossi job from taffspeed, the carb has been bored out to just short of 22mm by ian frankland and he was also responsible for the tuning of the cylinder, should be a little quicker than standard, i think cc wise it will be around 85, i'm sure someone will have the correct method of calculating it.

daz.h- Posts : 869
Join date : 2010-06-27
Age : 55
Location : york
Re: latest project
![]() daz.h Wed Nov 24, 2010 3:52 pm
daz.h Wed Nov 24, 2010 3:52 pm
up rated clutch springs, lots shorter than vega length, and too wide to sit correctly into the spider recess.

plenty of messing round trying to get squish correct, ended up at 1.2mm with no gaskets

daz.h- Posts : 869
Join date : 2010-06-27
Age : 55
Location : york
Re: latest project
![]() daz.h Wed Nov 24, 2010 4:15 pm
daz.h Wed Nov 24, 2010 4:15 pm

cylinder top with dowels.

piston at botom dead centre, exhaust and transfers open

daz.h- Posts : 869
Join date : 2010-06-27
Age : 55
Location : york
Re: latest project
![]() daz.h Wed Nov 24, 2010 4:20 pm
daz.h Wed Nov 24, 2010 4:20 pm

set up to check for top dead centre.

top dead centre now achived, arrow for tdc is now at the bottom of casing due to using electronic flywheel.

daz.h- Posts : 869
Join date : 2010-06-27
Age : 55
Location : york
houston..............we have ignition
![]() daz.h Thu Dec 02, 2010 3:49 pm
daz.h Thu Dec 02, 2010 3:49 pm
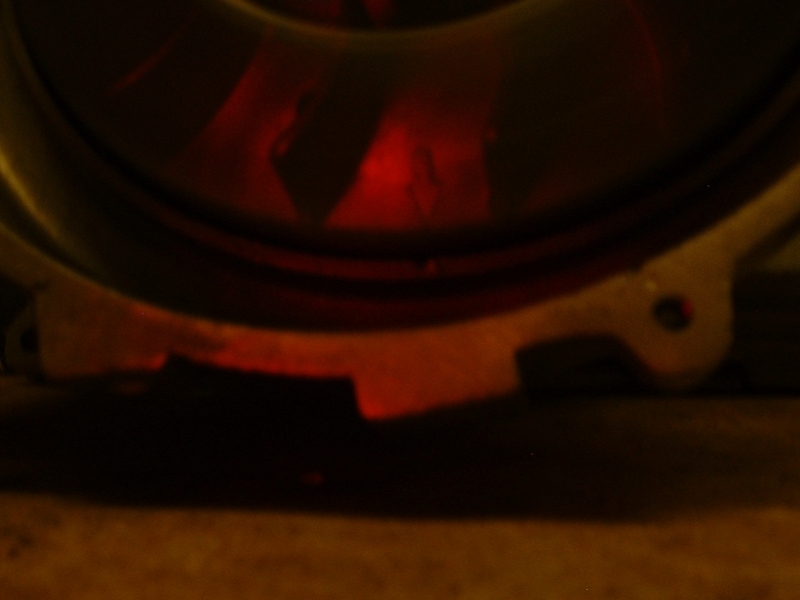
the orange/red glow is the timing light flash, this at 2800 rpm, via drill and 17mm socket
daz.h- Posts : 869
Join date : 2010-06-27
Age : 55
Location : york
Re: latest project
![]() littlemoon Thu Dec 02, 2010 5:11 pm
littlemoon Thu Dec 02, 2010 5:11 pm
littlemoon- Posts : 162
Join date : 2010-07-05
Age : 52
Location : east yorks tha know's
Re: latest project
![]() daz.h Sun Dec 05, 2010 4:20 pm
daz.h Sun Dec 05, 2010 4:20 pm
cylinder head is standard side, but obviously skimed and drilled for the dowells. btw have you modified a head cowl yet to suit the off set head? there is a tool that can reshape the spark plug hole.
tyre wise i reacon it will be standard 300x10, hopefully santa will be bringing a couple, if he can get them down the chimney
daz.h- Posts : 869
Join date : 2010-06-27
Age : 55
Location : york
Staffy (Gareth)- Posts : 169
Join date : 2010-06-26
Location : Just Outside Sunny Stafford -
Re: latest project
![]() littlemoon Mon Dec 06, 2010 1:30 pm
littlemoon Mon Dec 06, 2010 1:30 pm
daz.h wrote:remade tingtong exhaust, but fits great and looks wise only the anoracks will note the difference, and that would be from up close
cylinder head is standard side, but obviously skimed and drilled for the dowells. btw have you modified a head cowl yet to suit the off set head? there is a tool that can reshape the spark plug hole.
tyre wise i reacon it will be standard 300x10, hopefully santa will be bringing a couple, if he can get them down the chimney
i have not got round to using the head yet but it wont be long as my lui is ready for a rebore and new piston (vega75 motor). have you had it running yet
littlemoon- Posts : 162
Join date : 2010-07-05
Age : 52
Location : east yorks tha know's
Re: latest project
![]() daz.h Mon Dec 06, 2010 2:19 pm
daz.h Mon Dec 06, 2010 2:19 pm
a nice little engine frame would be a handy project for your students
daz.h- Posts : 869
Join date : 2010-06-27
Age : 55
Location : york
littlemoon- Posts : 162
Join date : 2010-07-05
Age : 52
Location : east yorks tha know's
Re: latest project
![]() Innocenti-71 Tue Dec 07, 2010 2:38 am
Innocenti-71 Tue Dec 07, 2010 2:38 am
On the right (rear) mudguards there are 2 clips:
- the left one is for the oil pipe of the Cometa oil tank
- the right one...I didn't spot before! Is it missing on my one? Or did you add it for wiring?
THANKS!

Innocenti-71- Posts : 62
Join date : 2010-11-10
Location : Aachen / Germany -
Re: latest project
![]() daz.h Tue Dec 07, 2010 5:52 am
daz.h Tue Dec 07, 2010 5:52 am
floor standing would be good, it could be kick started thenlittlemoon wrote:bench mounted or floor standing
daz.h- Posts : 869
Join date : 2010-06-27
Age : 55
Location : york
Re: latest project
![]() daz.h Tue Dec 07, 2010 5:55 am
daz.h Tue Dec 07, 2010 5:55 am
it was expertly added on by littlemoon, and yes its to keep loom tidy.Innocenti-71 wrote:@ Daz: Could you please help me with your picture:
On the right (rear) mudguards there are 2 clips:
- the left one is for the oil pipe of the Cometa oil tank
- the right one...I didn't spot before! Is it missing on my one? Or did you add it for wiring?
THANKS!
looking at it though, if i need to remove the stator at any stage i will have to strip half of the vega down to do so, so i will probably utilise the junction box, so engine etc ann be removed easier, but wires will still pass through the clip.
daz.h- Posts : 869
Join date : 2010-06-27
Age : 55
Location : york
Page 1 of 5 • 1, 2, 3, 4, 5 ![]()
|
|
|